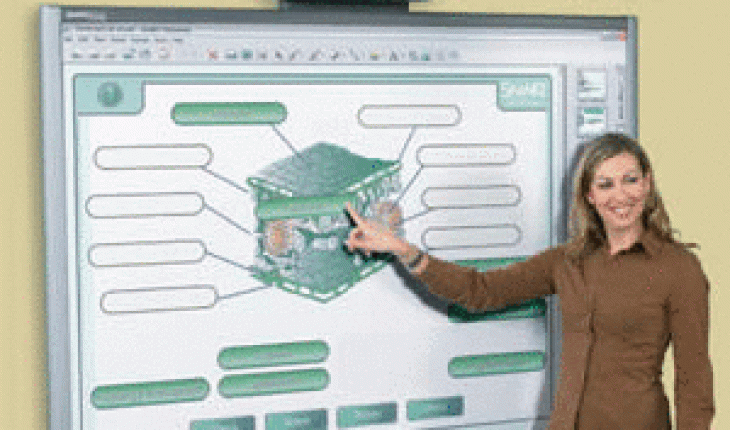
The Smart Board is an advanced and special whiteboard designed and manufactured by SMART Technologies. The product was launched in 1991 and it is considered as the first whiteboard that offers touch screen options and features various computer applications. The device is very easy to use because it is compatible with various applications developed by Microsoft Corp. The product is useful in presenting school lessons and business proposals. In order to benefit from the program, it is essential to learn how to use Smart Board efficiently.
Instructions
If you like to use the device, it is necessary that you install it appropriately to your computer. If you are having problems with the installation, you can seek assistance from computer experts. As soon as the device was connected to the computer, you can turn the whiteboard and the computer on. Check if all the connections were secured by logging in the computer. The device is ready to use when a green light appears on the bottom right part of the whiteboard.
Remember to align the white board to use it easily. By doing this, you will not have problems controlling the cursor. In addition, you can easily use your fingers to write on the board. This is also helpful to maximize the interactive features of the device. To align the board, you should right click the mouse while pressing the Keyboard button. When the Orientation Screen appears, select the icon that will appear on the upper left part of the screen of your computer. Select Again whenever the same option appears on the screen.
Check if a border appears on the screen and then get the pens. Start writing on the board. If you want to change the tool that you are using, return the tool that you are using in the appropriate place before getting another tool. If you like to erase all the notes that you have written on the board, just select the Clear Writing option at the menu. If you like to save the notes , select the Camera icon on the board. If you want to some of the notes, then you need to choose the Area Capture option. Afterwards, select the notes that you like to save. Choose the File option and then the Save option to capture the notes. If you are done using the projector, just turn it off and then close the program in the computer. Shut down the computer and remove all the cables connecting the two devices.

