Windows Live Messenger is an instant messaging client software that comes preinstalled with your newly bought Windows operating system. It will automatically be installed if you make a clean install of Windows XP. Some find this software client annoying while others make use of it. However, there are those who just can’t make it work for them and prefer other instant messaging software available.
In case you are unsure whether you want the program or not you have the option to disable this messaging software instead of uninstalling it from your computer system. The steps outlined below will guide you on how to disable Windows Live Messenger.
Supported Operating Systems
This instant messaging software runs on both Windows XP and Windows Vista or any later version of the Windows family of operating systems. Unfortunately, you do not have the option to not install this program when making a clean install of these operating systems. Once you have established that you have a supported operating system then you may proceed onto the steps on how to disable Windows Live Messenger.
Easy Steps to Disable Windows Live Messenger
You won’t find an option to disable Windows Live Messenger on the client software’s graphical user interface. So you have to go for another option in order to do this. Clicking on ‘Start’ or, if you have a Windows keyboard, you may press the Windows button, which is usually the ones right next to the Control buttons (i.e. labeled as ‘Ctrl’).
If you are running Windows XP then your next step is to click on ‘Run’. However, if you have Windows Vista installed on your machine then you type ‘Run’ on the Start Search box and click ‘Run’.
On the Run window, type ‘services.msc’ on the open textbox. After which you either click ‘OK’ or hit ‘Enter’ on your keyboard. This will open the ‘Services’ window with a list of running windows services on one pane.
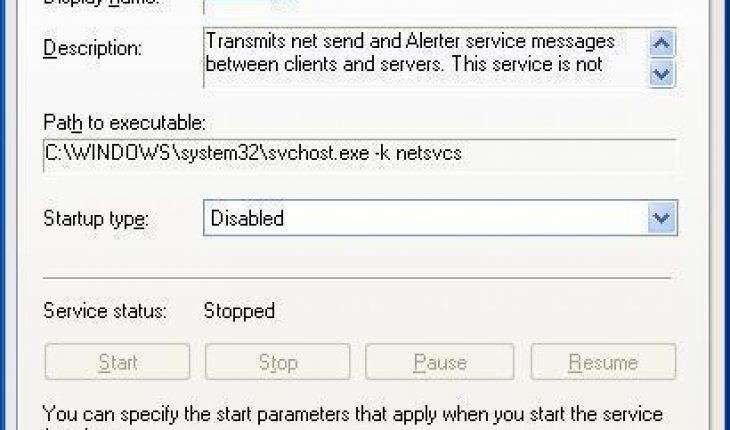
In the list of services, look for ‘Windows Live Messenger’. Sometimes it will appear on the list as simply ‘Windows Messenger’. To disable Windows Live Messenger, double click on it. You will be prompted to change the startup type, click ‘Disabled’ when the prompt comes up. This means you will see a drop down beside ‘Startup type’. Select ‘Disabled’ from the drop down menu options. You then click ‘Stop’ on the Service Status section and then click ‘OK’ at the bottom of the window after the service has been stopped.
Take note that when you disable Windows Live Messenger, you still have it on your system and may enable it anytime you wish to use the program. In case you just want to get rid of it, then you may instead follow the steps to uninstall Windows Live Messenger.