The steps required for installing door molding are described below. All of these materials can be obtained in any hardware store.
Required Tools and Materials
Hammer
Paint or stain
Miter saw
Wood putty or filler
Finish nails
Awl
Measuring tape
Molding
Wood scraps
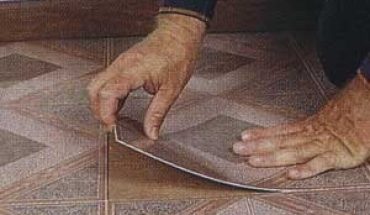
Take Out the Old Molding
Put two pry bars on the old molding. Insert some wood scrap so it doesn’t come into contact with the wall. Push the bars on opposing sides. Be careful when you do this so the wall doesn’t get damaged.
Measuring
Get the height from the top sill to the upper side of the door frame. You also need to input the header molding you’ll be using when making this measurement.
Installing Door Molding
Miter the slanting joint and link the molding. Use a miter saw to slice the pieces to the necessary size. The points should be at a 45 degree angle. Next, install the header piece using the nails. Ensure that it is level.
Press the vertical molding up against the header; they need to be perpendicular. Link to the header and nail it. Use the awl to sink it. Make sure that it is firm. Put some filler around the nail holes. Apply some paint or stain if desired. Give it sufficient time to dry.
Warnings
Before installing door molding, you must use the pry bar carefully. Despite the name, only use it by pushing or pulling. Trying to pry it off will damage the wall and cause more trouble.
Protect yourself when sawing and cutting material. Put on protective goggles to prevent dust from getting in your eyes. Don a mask before painting so you don’t inhale any of the toxic material.
There are some people who are very sensitive to the smell of paint. Getting a sniff makes them nauseous, so it’s best to protect yourself. Even if you don’t mind the smell, they may contain toxins. How much coating you put is up to you. The more you put in, the longer it will take to dry up.
Tips
Be careful when using the miter saw. Follow the directions as specified. A circular saw can do the job just as well. You can also use a miter box. Some shops allow you to rent one of these.
Those with more experience in installing door molding can use a coping saw. This tool requires a good and firm hand however. A block plane and sand paper can do the job, but not as effectively. These two don’t work very well with a tight joint.
Also, you should double check the measurements before nailing any pieces in place. This is particularly important when mitering the joints at the 45 degree angle.
Choose filler that is compatible with the paint. If it’s incompatible it will fall away. Not all moldings accept filler materials. Check your molding for the appropriate filler.
There are people you can hire for installing door molding. However these instructions will let you start and finish the project yourself. This will save you money in the long run.