Some people find Windows Live Messenger as an annoying little program. Others simply played around with it and never liked it. Well, whatever reason you might have for wanting to remove this program on your computer, you might want to know how to uninstall Windows Live Messenger.
Those who were smart enough to make a full image backup of their hard drive simply need to restore their system using that backup image. Those unfortunate enough that haven’t done this will have to go over several steps on how to uninstall Windows Live Messenger.
How to Uninstall Windows Live Messenger from the Control Panel
This might be the place where you would first think to look in order to uninstall this program. You click on Start then Control Panel and then Add/Remove Programs in Windows XP. Click Windows Live Messenger in the list and click Remove.
If you’re using Windows Vista then go to Control Panel then Programs, and then click Uninstall a program. You then double click on this program on the list and click yes when prompted. The steps on how to uninstall Windows Live Messenger is pretty similar on both Windows platforms.
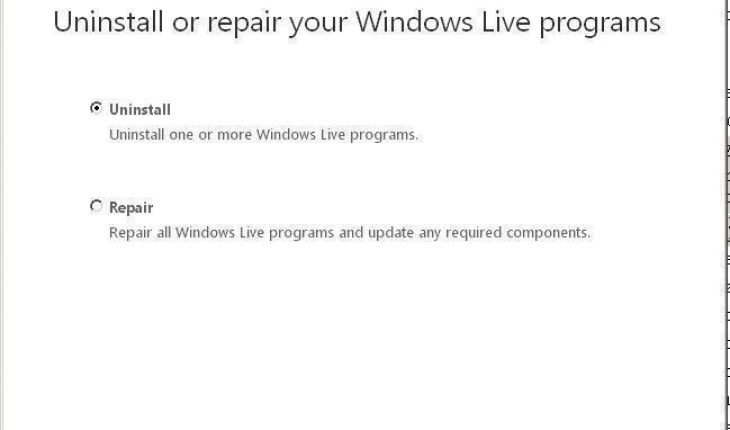
Now, if for some reason you can’t find Live Messenger on the list of programs to uninstall look for Windows Live Essentials. When you uninstall this program you’ll be given the option to uninstall either a mail program or Messenger or both. Put a check on ‘messenger’ and then click ‘Continue’. Follow the on screen options to uninstall this program from your computer. Click ‘yes’ in the next window that prompts you to restart your computer.
Other Methods
For some reason, there are those who complain that they can’t find Live Messenger or Live Essentials on the list of programs to uninstall. If that is the case then you have to go for other options on how to uninstall Windows Live Messenger.
First option is to go to Start then Run, for Windows Vista type ‘Run’ into the Start Search and open it from there. In the open box on the Run window type the following: RunDll32 advpack.dll,LaunchINFSection %windir%INFmsmsgs.inf,BLC.Remove and then click OK. Click ‘yes’ in the next window that comes up, which will ask you to restart your computer.
Your other option will follow the same procedure by going to the Run window. Key in the following command instead of the one mentioned above: Msiexec /x {0AAA9C97-74D4-47CE-B089-0B147EF3553C}. Click OK in the next window when asked to confirm the uninstallation.
These are your options on how to uninstall Windows Live Messenger. In case you’re a bit unsure about uninstalling this program you have the option to disable Live Messenger instead.