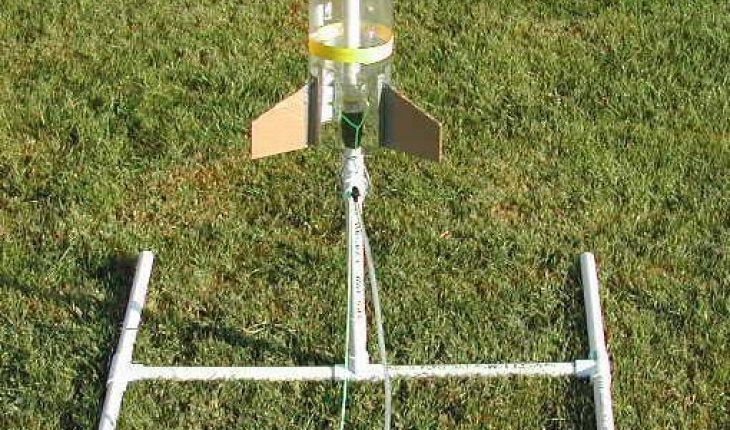
Learning how to build a bottle rocket is not that hard. This tutorial includes both making the bottle fly and also constructing the launching pad.
Tools and Equipment
Bottle (two liters)
Rubber cement
Marker or pen
Paint thinner
Balsa wood (get several sheets)
A manila folder
Tape
For the launching pad get the following ready:
Wood (2 x 4)
Test tube stopper (number 4)
Copper tubing
Nails (2)
Hose clamp
Driller
Water (3 cups)
Air pump
Screws
Electrical knockout junction box
Steel bar (1/8 in wide)
String
Preparing the Bottle
Remove any contents in the bottle. Take out the label too. If necessary wash and let it dry. Use the thinner to remove any leftover adhesive from the label. Begin to build a bottle rocket by shaping the balsa wood into fins. Make four of these. Ensure that the wood grain is parallel to the fin edge. This will help in fortifying it. Sand them.
Apply some rubber cement to connect the fins to the bottle. They need to be at equal distances so use a marker to highlight the areas. Apply some tape to hold the fins in place. When the cement hardens you can remove it.
Take the manila folder and slice into a cone shape. Use cement to join it to the soda bottle.
Assembling the Launch Pad
Make the launch pad after you build a bottle rocket so the process is quicker. Slice two blocks from the 2 x 4, Make it 6 inches. Cut another piece (1 ½ ft long x 6 inches wide and 1/2 in thick). Fasten the smaller pieces onto the large one. You will end up with something like a wood table.
Use the screws to fasten the junction box onto this piece. Drill a hole that goes through the box and the wood table.
Cut the copper tubing and insert in the test tube stopper. Fasten the tube to the air pump using the clamps. Take the small steel and bend until it becomes a U shape. Attach a string to the metal. Insert it in the side of the junction box. Drill openings on the launching pad. Put a nail through.
Testing
After you build a bottle rocket and launch pad, testing will be needed. Put three cups of water into the bottle. Set the bottle onto the pad. Insert the pin at the bottle’s neck area. Enable the air pump. Set the psi to 45. Now that everything is in place, you’ll just need to pull the string to get it to fly.
You can use the bottle repeatedly, but you can make as many as you like. You can also decorate or paint it. You can add some color to the fins as well. For higher launches, turn the psi to 75.
There are several high tech toys out there but this one has it own unique attraction. By learning to build a bottle rocket you’ll gain satisfaction and enjoyment not just from watching it fly, but knowing it’s your own handiwork.


